5 Reasons Why It’s Important To Clean Your Mattress
How Often Should You Clean Your Mattress – And Signs It’s Time To Do So
Mattress Care 101: 9 Ways To Keep Your Mattress Clean
Infographic: How To Clean A Mattress
How To Clean Different Mattress Types: A Step By Step Guide
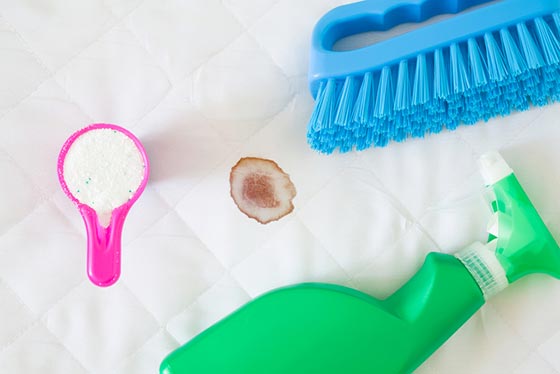
Know Your Enemy: Common Stains And How To Get Rid Of Them
What About Mold, Dust Mites, And Bed Bugs?
DIY Stain-Removal Kit: A Complete List Of Essential Supplies
Safety Precautions To Keep In Mind Before You Start Scrubbing Away
FAQ About Mattress Care
5 Reasons Why It’s Important To Clean Your Mattress
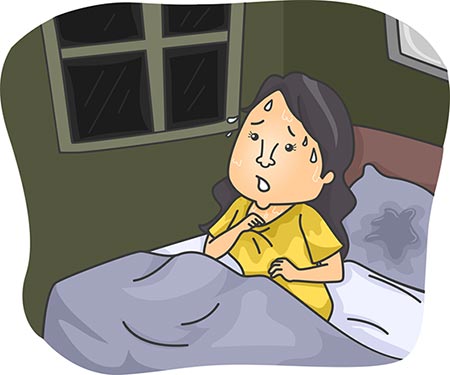
Do we even have to have this conversation? Between all the sweating, nighttime snacking, and shedding your skin while you sleep (our bodies do weird stuff while we’re out), your bed is bound to get dirty – and when they do, your sleep quality will suffer.
1 You’ll Get Rid Of Dust Mites
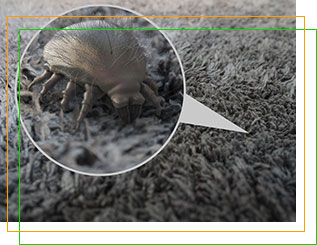
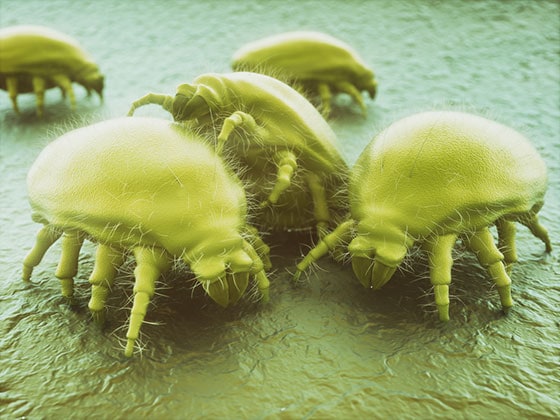
Did you know that an average human sheds roughly one and a half pounds of skin per year? Since we spend around a third of our lives asleep, some of it is bound to end up in your mattress. And guess who gets to feast on all those dead skin cells?
That’s right, dust mites!
If you haven’t cleaned your mattress for a while now, the chances are that you’re not sleeping alone – there might be millions of dust mites sharing the bed with you, too. Sounds gross, right? Plus, it can play a huge role in your overall health, but more on that later.
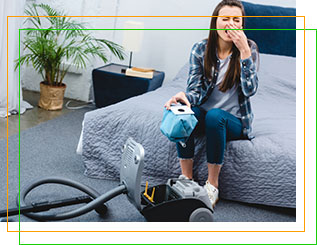
Anyway, I think this reason alone should be enough to motivate you to turn on your carpet vacuum cleaner and put an end to it right now. If not, I’ve got four more reasons for you – so, keep on reading!
2 Less Dust Equals Better Air Quality
We tend to worry about the air pollution in our cities, but one thing we often overlook is the air quality in our homes. Now, you’re probably wondering:
What does this have to do with cleaning your mattress?
The thing is, our mattresses account for the majority of the dust we find in our homes, which makes our bedrooms the dustiest rooms in them – if we don’t clean our mattresses, that is.
Along with everything else you might find in a dirty mattress, dust is one of the primary reasons why so many people suffer from allergies outside of allergy season, too, and a good enough reason to keep your mattress clean!
3 It’s A Breeding Ground For Bacteria
Here’s where it gets genuinely yucky – besides the thousands (and possibly even millions) of dust mites that call your bed their home, a mattress that hasn’t been cleaned for a while can become a breeding ground for some nasty bacteria, as well.
Think about how much you sweat every night – all that moisture has to go somewhere, right? Unfortunately, some of it ends up in your mattress, too, and as you know, a dark, moist area is pretty much what heaven looks like to bacteria.
4 Allergy Management
Every time you toss and turn in bed at night, you stir up a lot of dust, and end up breathing it in – and if you or anyone else in your home is allergic to dust, it can turn a beneficial eight-hour rest into a not-so-pleasant experience for your respiratory system.
Don’t even get me started on dust mites! If you’ve been experiencing a lot of nighttime asthma attacks, but you can’t quite figure out why I’d say your mattress might be the one to blame.
Keeping your mattress allergen-free is the best thing you can regarding allergy management – you wouldn’t keep eating peanuts if you had a peanut allergy, now, would you?
5 Better Sleep Quality
Lastly, can we all agree that sleeping on freshly cleaned sheets is the best feeling in the world?
Keeping your mattress clean can contribute to that fantastic feeling, too – just knowing that you’re not spending the night on a literal pile of dust, skin flakes, and dust mites can do wonders for your sleep quality!
How Often Should You Clean Your Mattress – And Signs It’s Time To Do So
Before we wrap things up, here are some of the most common questions people have when it comes to cleaning their mattresses:
You Haven’t Done It Already
The first and likely most obvious sign that you’re long overdue with the mattress cleaning is the fact that you haven’t done it yet. It doesn’t matter if you haven’t done it in the last couple of months – or ever – the verdict stays the same: if you want a nice-looking, fresh-smelling mattress, you have to clean it every few months.
You’re Waking Up With Bug Bites
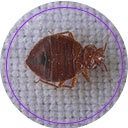
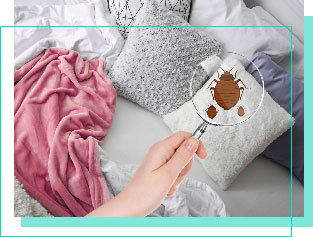
If this is the case, I’m afraid I have some bad news – you might be dealing with a bed bug infestation. It might be hard to spot during the early stages, so don’t beat yourself up over it – what you do next is what matters. Now, I don’t have to tell you how tricky getting rid of bed bugs can be, so if you notice the bites, or any other signs of an infestation, such as dark stains, or even actual bugs, declare war to them. The sooner you start treating it, the easier it will be.
Your Allergy Symptoms Get Worse At Night
Here’s a sure way to tell if your bedroom might be the cause behind all that coughing and wheezing – if you’re mainly experiencing the symptoms at night or first thing in the morning, it’s probably time to get rid of dust build-up in your mattress. Otherwise, you’re probably just caught up in the middle of allergy season.
There Are Visible Stains
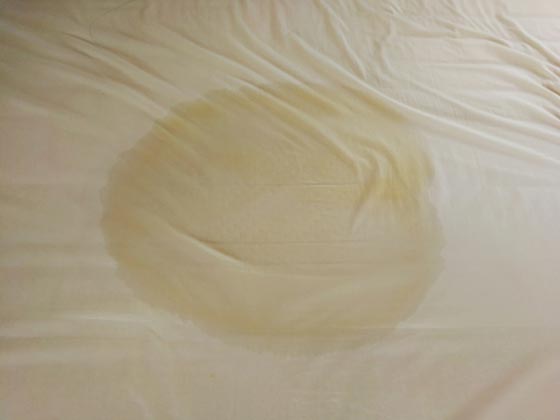
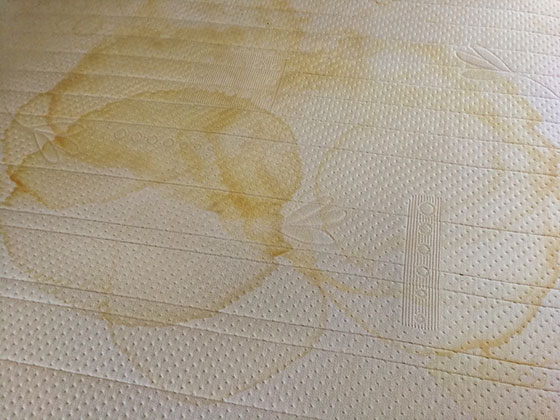
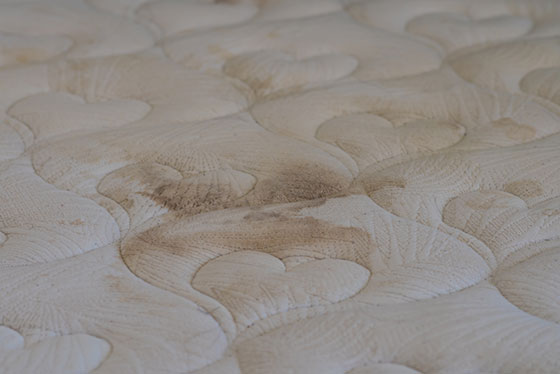
Here’s a pretty hard-to-miss clue for you – stains on your mattress. It doesn’t matter if you know where they came from or not, stains are always a clear sign it’s time to clean your bed. Granted, if you did try to clean them right away, but it didn’t work, stick around – I have some tried and true stain removal methods in store for you!
It Smells
Do I need to say more? If you got to a point where your mattress developed an odor, be it from bodily fluids or dust build-up, there’s something wrong there. Mattresses shouldn’t smell (except for the initial off-gassing, of course, but that’s an entirely different story), which means it’s time for a thorough cleaning, and, by the looks of it, deodorizing, too.
Mattress Care 101: 9 Ways To Keep Your Mattress Clean
If you want your mattress to last, and stay clean doing it, there are some habits you’ll have to adopt:
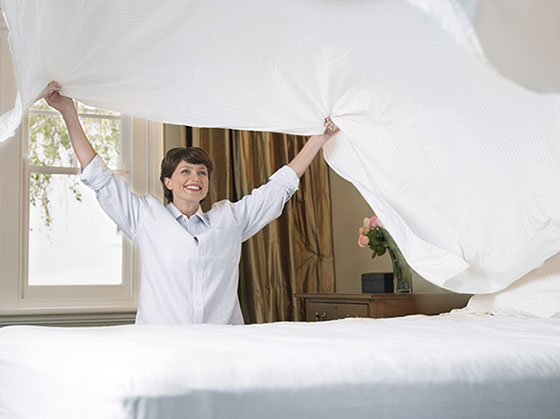
1 Change The Sheets
Your sheets should have a weekly trip to the washing machine. Make that two weeks if you don’t feel there’s a need to change them that often. Anything longer than that is a crime against your mattress. Cleaning your bed without washing the sheets is pretty pointless, don’t you think?
Plus, this gives you a chance to do a quick check of your mattress’ condition, and look for stains, bed bugs, and other things that might affect its longevity.
Additional Tip: On the days when you’re changing the bedding, don’t put them back until bedtime – airing out your mattress like that does wonders for preventing bacteria growth.
2 Flip It
Before we move on, I have to warn you – if you have a large mattress, you’re not going to like this part at all.
If you’re looking to increase the lifespan of your mattress, you should get in the habit of rotating and flipping it regularly. And by regularly, I mean every few months. Doing so will ensure a more even wear and tear, and help avoid the formation of indents since you won’t be putting continuous pressure on only one area of the mattress.
That said, newer mattresses often don’t need to be flipped due to their customized layers and one-sided design.
Additional Tip: Even if your mattress doesn’t need to be flipped, rotating it still something you should do at least a few times a year.
3 Moisture And Mattresses Don’t Get Along
That’s particularly true for memory foam mattresses – those things have a strong dislike for liquids of any kind!
Having a cup of tea or your morning coffee in bed sounds excellent, but it’s one of the surest ways to destroy your mattress. Sure, you can be extra careful when you’re bringing liquids into the bedroom, but accidents happen to the best of us. Considering how expensive a new mattress can be, you shouldn’t test your luck like that. Better safe than sorry, right?
4 Keep The Temperature In Check
Get in the habit of lowering the temperature in your bedroom a bit. I’m not saying you should sleep in a cold bedroom, but a slight adjustment to the thermostat before going to bed can make a huge difference.
Not only will you stop sweating as much at night, which will prevent the growth of mold and mildew, but you’ll create a not-so-friendly environment for all the dust mites and bacteria that enjoy dark, warm conditions such as those your mattress offers, as well.
5 Vacuum More Often
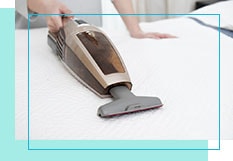
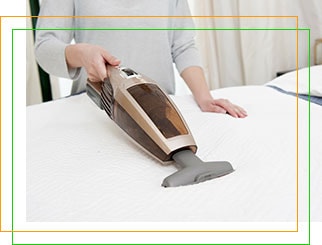
Aim to vacuum your bed at least every few months to prevent the dirt and dust build-up from getting out of control.
One thing you need to pay attention to is using the right adapter. For the mattress’ top and sides, use an upholstery adapter. It’s a great way to clean the bed’s box spring, too. Now, if you want to get in there, the crevice adapter will be your best bet.
You should make sure the adapters are clean, too. You don’t want to introduce even more bacteria to your mattress!
6 Invest In A Mattress Protector
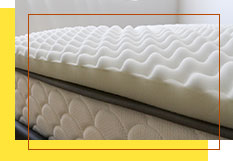
Another great way to protect your mattress and make it last longer is to invest in a mattress protector, or even a quality mattress topper. Think about it – instead of trying to get those annoying stains out of your mattress, all you need to do is throw the protector in the washing machine.
Oh, and while you’re at it, make sure you opt for a waterproof one – not only will it keep your mattress safe from accidental spills, but from bacteria and odors, as well.
7 Air It Out
As I mentioned earlier, airing out your mattress as often as possible is one of the best things you can do. Not only does it eradicate mildew and bacteria, but helps keep it odor-free, as well.
So, take advantage of sunny days, and let your mattress sit outside for a few hours. If that’s not an option, though, you can place it near an open window, and let the fresh air and sunshine do their thing.
8 Don’t Make The Bed As Soon As You Get Up
If you weren’t a fan of making your bed first thing in the morning, I have excellent news for you:
Making your bed as soon as you get up is a bad idea. I guess you were right all along!
Of course, I’m not saying you shouldn’t make your bed at all, and leave it like that until bedtime. However, what you should do is leave it undone for at least thirty minutes while you get ready for work – the longer, the better. So, pull the covers back, and give moisture and odors a chance to escape before you make your bed. That way, you won’t be trapping it under the covers.
9 No Food In The Bedroom
Liquids are not the only thing that doesn’t belong in the bedroom – add food on that list, too!
Not only are you risking hard-to-remove stains, but unwanted visitors, as well. Even something as harmless as a bedtime snack could result in a cockroach or ant infestation, only because a few crumbs left unnoticed.
If snacking in bed while watching an episode of your favorite show is the way you prefer to spend your nights, though, you’ll have to commit to changing your sheets more often – every few days would be ideal.
How To Clean Different Mattress Types: A Step By Step Guide
Regular mattress cleaning is one of the essential things you can do to ensure its longevity – even the birds on the trees know that by now. So, one of the first questions we need to tackle today is:
How to clean a mattress?
Here’s where it gets tricky – different materials call for different cleaning methods, so pay close attention, and try not to mix them up by accident!
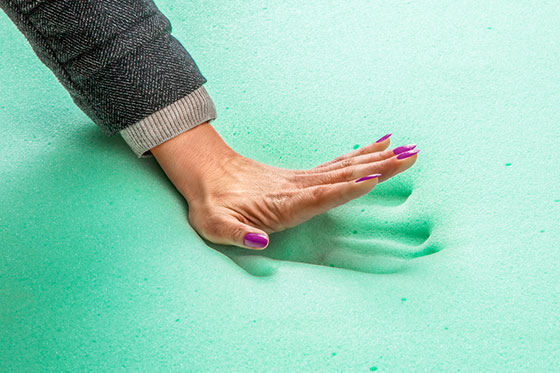
Memory Foam
You’ve probably heard before that memory foam mattress requires some special care, and I’m not going to lie to you – it can be a bit of a hassle. However, if you follow these simple tips I’m about to give, you’ll learn all the tips and tricks of how to clean a memory foam mattress like a pro.
Plus, if your mattress came with a removable, machine-washable cover, you’re already halfway there.
Let’s get started!
- If possible, remove the cover and wash it according to the instructions.
- Start by vacuuming the mattress. Make sure you use gentle, circular motions that won’t damage the surface.
- Now, you should mix warm water and mild liquid detergent in a two to one ration, pour it in a spray bottle, and treat the mattress lightly with the cleaning solution.
- Let it air out, but make sure you’re not leaving it outside in direct sunlight.
- Once it’s dry, sprinkle baking soda all over the surface, and let it sit overnight.
- All you need to do now is vacuum your memory foam mattress.
Additional Tip: If you want to freshen up your mattress, you can mix ten ounces of water with four ounces of fabric softener, spray it all over the mattress, and leave it to dry. Works like a charm every time!
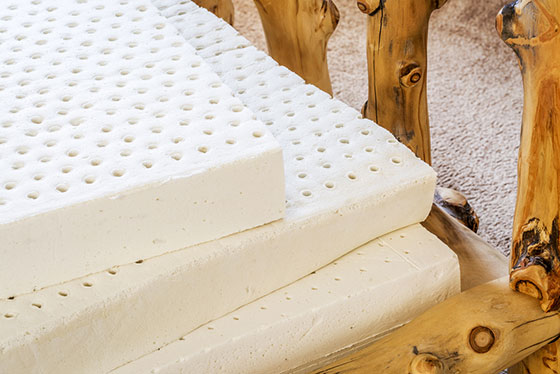
Latex
Latex mattresses can be super comfortable – but they’re quite expensive, as well. So, as a latex mattress owner, you’re probably looking for ways to clean yours without accidentally damaging it in the process.
Don’t worry; you have me in your corner, and I have excellent news for you – latex mattresses are very easy to clean because they mostly require common household ingredients!
- Mix three to four drops of liquid soap (preferably a mild one) with warm water, and stir it a bit to form soap bubbles.
- Dip a white cloth into your soapy mixture, and spot-clean your mattress. Don’t forget to squeeze out the excess water before you start!
- Dampen another cloth (again, make sure it’s white) under warm water, and use it to wipe the soapy cleaning solution from your mattress.
- Lastly, leave it out to air dry. That said, leaving your latex mattress in direct sunlight is a bad idea, so try to keep it in the shade while it dries.
Traditional
Innerspring, or “traditional,” mattresses don’t have many of the anti-allergenic or anti-bacterial features that the majority of new foam mattresses boast. As such, they require continuous attention and care from their owners.
Luckily for you, though, caring for an innerspring mattress can be pretty easy, as long as you follow a few essential guidelines. On that note, here’s how to clean an innerspring mattress:
- Start by vacuuming the mattress – top, bottom, and sides. That should help get rid of dust mites and all the dirt build-up.
- Mix water and white vinegar in a two to one ration, pour it in a spray bottle, apply all over your mattress, and let it sit for an hour or so. It’s one of the easiest ways to disinfect your bed.
- Soak a towel in warm water and use it wipe down the mattress, and remove the cleaning solution.
- Next, sprinkle some baking soda on it to get rid of the smell. If you notice any discolorations, you can use a brush with soft bristles to “massage” in the baking soda. Leave it like that for an hour.
- Lastly, vacuum the mattress again, and let it air dry.
Keep Your Pillows Clean, Too
By now, you know you should wash your sheets once a week (two weeks tops), and that your mattress requires a certain level of care, too, although not as frequent. What about your pillows, though? How often should they be cleaned?
First off, you can’t even imagine the amount of gross stuff that builds up in your pillow. Saliva, sweat, oils, dirt, and sometimes even mold – to name a few. So, yes, you should clean your pillows at least two times a year. If you live in a warm climate (meaning you sweat a lot during the night), you should probably make that four to six times a year – or every few months.
Additional Tip:
If you’re not sure if your pillows are even worth fighting for at this point, a simple test will tell you a lot about their condition. Fold it in half – if it bounces back, it’s still good. If not, it’s probably time to get rid of it and get a new one.
In between trips to the washing machine, you can air them out every month or so, too. Leave them out on the clothesline for a couple of hours, or, if that’s not an option, put them in the dryer for a quick, no-heat cycle.
Now, as you can imagine, the type of pillow you have plays a huge role in determining the best cleaning method. Here’s what you need to know:
-
Down Or Feather Pillows
For down or feather-filled pillows, you should use a mild detergent (liquid one will work better, as it won’t leave any residue), warm water and a delicate setting. It’s always a good idea to roll the pillows up and secure the ends, to prevent the filling from shifting and clumping too much.
When it comes to drying, use a no-heat setting – it will take time, but you won’t end up with a pillow that smells like singed feathers.
-
Memory Foam And Latex Pillows
Unfortunately, you can’t wash these without the risk of them falling apart. To make matters worse, steaming memory foam isn’t an option, either.
So, if you have memory foam or latex pillows, you should focus on damage control. Spot-cleaning and pillow covers are your best bet here.
-
Buckwheat Hulls
If you’re able to remove the filling, do it on a cookie sheet. Spread the buckwheat hulls in an even layer, and leave them out in the sun. In the meantime, you can wash the casing with a mild detergent and cold water.
-
Polyester Pillows
You can wash most polyester pillows in the washing machine – a gentle cycle, warm water, and a tiny amount of detergent (no more than a tablespoon of liquid soap) should do the job. Washing a few at a time is a good idea because it will balance the load.
Know Your Enemy: Common Stains And How To Get Rid Of Them
Stains are, by far, the most common issue you’ll encounter as a mattress owner. Accidents happen, and liquids get spilled – it happens to the best of us. But it also leaves you with some not-so-pleasant sights and smells.
Here’s how to get rid of them!
Sweat
Everyone sweats, especially when they sleep, there’s no point in denying it – it’s a perfectly normal bodily function all of us have to deal with on daily (well, nightly) basis. However, your mattress won’t be as understanding, and before you know it, sweat stains will rear their ugly heads!
Here’s how to take care of them:
Hydrogen Peroxide, Baking Soda And Liquid Soap
- Mix three tablespoons of baking soda and eight ounces of hydrogen peroxide with one drop of liquid soap (dish soap will do), and pour it in a spray bottle.
- Spray the stains and let the solution sit for around five to ten minutes.
- Use an absorbent pad to blot out any residue.
- Let the mattress air dry.
Borax
- Start by dampening the stain with water.
- Pour a tiny amount of Borax onto the stained area of the mattress, and use a white cloth to rub it in using a circular motion.
- Leave it to dry and vacuum the area once it does.
- Feel free to repeat the process if necessary.
Blood
Okay, I have to warn you upfront that getting rid of blood stains might be the trickiest thing on this entire list, especially if you’re dealing with old and dried blood. As you can imagine, time is of the essence here – the longer you wait to deal with a blood stain, the harder it will be to remove.
On that note, if you discover a bloodstain that’s long overdue for cleaning, you can expect it to take several turns before you remove the stain entirely – or at least make it less noticeable.
Fresh Blood Stains
If you’re dealing with a new bloodstain, you have two stain removal methods at your disposal:
Baking Soda
- Mix approximately 20 ounces of cold water with four ounces of baking soda. It has to be cold water, though – warm water will only “cook” the protein in the blood, and set the stain.
- Use a cloth to apply this solution to the stain and let it sit for 30 minutes or so.
- After half an hour has passed, rinse the area thoroughly with a damp cloth, absorb any excess moisture with a dry towel, and leave the mattress to dry.
Water And Salt
- Dissolve two teaspoons of salt in approximately 10 ounces of cold water, and then pour it into a spray bottle. Again, don’t make the mistake of using warm water!
- Spray the salt water over the stained area, and then blot it with a dry cloth to remove excess moisture.
- Repeat the process a couple more times, to get as much of the blood out of the mattress as you can.
- Rinse the area with a damp cloth, use absorbing pads to get rid of moisture, and dry the mattress.
Old Blood Stains
As I said, dried blood stains can test your patience, as they usually require several applications. Hydrogen peroxide is your best bet here, but you need to remember that it’s still a bleaching agent, so there’s a risk of changing the color of your mattress by accident.
Hydrogen Peroxide
- Combine two ounces of hydrogen peroxide, one tablespoon of salt, and four ounces of cornstarch, and mix it well until you create a paste.
- Apply it directly to the stained area.
- Coming in contact with hydrogen peroxide will cause the blood to foam up, so blot it immediately – you’ll remove a vast portion of the stain just by doing that.
- Now, add another layer of paste, but this time, leave it to dry.
- Once it’s dry, scrape it off, and follow up with a thorough vacuuming.
- Feel free to repeat the process if the stain is still there.
Urine
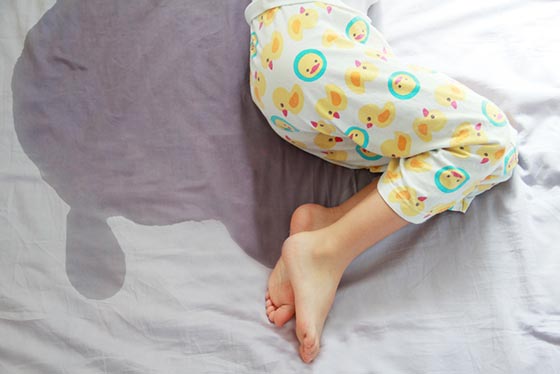
Maybe your kids aren’t as potty-trained as you thought, or you waited too long for your dog’s daily walk – whatever the case may be, you now have a urine stain to remove. I’m not going to lie to you – it’s going to be tricky, only because you have to deal with the odor, as well.
By now, you’re probably sorry that you didn’t get a mattress protector, huh?
Fresh Urine Stains
Okay, this one’s going to be easy. Sure, cleaning up urine isn’t how I like to spend my days, either, but at least you caught it as soon as it happened, and you don’t have to deal with damage control and dried up urine stains.
Anyway, here’s what works in these situations:
White Vinegar
- Start by blotting the urine with paper towels – you want to soak up as much of it as possible. Don’t be afraid to apply pressure.
- Now, mix one part white vinegar with two parts lukewarm water, pour it in a spray bottle, and spray all over the stain.
- Again, do some blotting.
- If the smell and the stain persist, repeat the process a couple more times.
- Leave the mattress to air dry.
- Use water to wash out any residual solution (be careful not to wet it excessively) and blot it dry.
Hydrogen Peroxide And Baking Soda
- Again, the first thing you need to do is soak up the urine with a cloth.
- Make a solution by mixing three tablespoons of baking soda in eight ounces of hydrogen peroxide, and spray the urine stain with it.
- Leave it to dry, and when it does, apply some more baking soda – to be on the safe side.
- Let it sit overnight and use a vacuum cleaner to clean it up in the morning.
Dried Urine Stains
Here’s where it gets tricky – when left untreated, urine can cause permanent damage to your mattress. I’ll help you try and get it cleaned up, but I can’t guarantee you it will work:
Vinegar And Baking Soda
- Mix vinegar with warm water in a half-and-half ration and pour it in a spray bottle.
- Spray the vinegar solution on the stained area, and blot it dry.
- Next, you should sprinkle some baking soda on it, as it helps get rid of the smell.
- Let it sit overnight and vacuum the mattress in the morning.
Pet Urine
Let’s say you left your furry companion unsupervised for a couple of hours, and when you finally came back, they greeted you with a big, wet spot on your bed. Ah, the wonders of being a pet parent!
Anyway, here’s what you can do to take care of the stain:
Enzyme-Based Cleaners
- Start by absorbing as much as you can with a cloth.
- I strongly recommend using enzyme cleaners for pet urine stains, because they’ll break the uric acid.
- Once you apply your cleaning agent of choice, let it sit for approximately 10 to 15 minutes.
- Use an absorbent pad to blot up the enzyme cleaner, and leave the mattress to dry.
- If it doesn’t work the first time (which could happen with older stains), you should give it another try.
Vomit
Yes, it’s gross, I know, but no one pukes on purpose, and I’m sure whoever did this to your mattress is feeling even worse than you are. Anyway, let’s get down to work – you have some vomit stains to clean up, and I’m going to help you!
- The first step is the hardest, I promise – you have to get rid of all the solid parts before you move on to the liquids.
- The next thing you should do is remove the sheets, as well as anything else that might have been affected, such as a mattress protector. Wash everything on a high-temperature setting.
- Now, soak up the remaining liquid with a dry cloth. Try to get as much as possible out, but make sure you’re not rubbing the stain.
- Pour some hydrogen peroxide on the affected area, but try not to soak the mattress.
- Let it sit for approximately five minutes before you blot it out with a dry towel.
- Lastly, sprinkle the stain with baking soda, let it sit overnight, and vacuum the mattress the next day.
Other Common Stain Types You Should Know About
To know how to clean a mattress the right way, you first need to figure out what type of stain you’re dealing with – and this table should be able to help you with that!
| Type Of Stains | Examples | Suitable Cleaning Method |
|---|---|---|
| Plastics and Resin | Nail polish, cuticle oils, plastic glue, varnish, contact cement, lacquer, and such | Dry cleaning solvents (Extremely hard to get rid of) |
| Water-soluble Body Waste, Deodorants, Red Dyes | Various types of red dye (ink, watercolor and such), deodorants, antiperspirants, sweat, non-chocolate candy, urine (Common stains in households with small children) | Water and detergent solutions |
| Medicinal | Various kinds of liquid medicine, such as penicillin, iodine, and silver nitrate (Commonly found in hospitals) | Requires special chemical treatment with sodium thiosulfate solution |
| Oxidizing Oils and Gums | Butter, coconut oil, olive oil, castor oil, and other types of vegetable oils, chewing gum, rubber cement, asphalt | Dry cleaning solvents |
| Dyes, Inks, Pigments | Different kinds of food coloring, inks, non-red dyes and pigments, gentian violet and such | Simple water and detergent solutions |
| Tannin and Glucose | Various alcoholic beverages (wine, beer, whiskey), tea, black coffee, berries, colored vinegar, fruit juices, dark-colored sodas and such (Hot liquids containing tannin are particularly hard to remove) | Vinegar and detergent solutions |
| Food (Oil and Fats) | Combinations of oil-based ingredients and protein, such as egg yolks, ice cream, pudding, mayonnaise, cheese, chocolate | Dry cleaning solvents |
| Protein and Starch | Combinations of protein and starch, such as egg whites, glue, bodily discharge, and mucous, mouthwash | Lukewarm (not hot) water and cleaning agents that contain enzymes |
| Hydrophobic | Oil and grease-based stains, such as wax, lubricating oils, crayons, body lotions | Dry cleaning solvents |
Mission Impossible: When You Should Call It Quits
With such a detailed guide at your disposal, you might think you’re ready for anything, but the unfortunate truth is that sometimes the damage is pretty much irreversible, because your mattress’ condition reached a point of no return. There’s nothing left for you to do – it’s as simple as that.
In times like that, it’s important to know when to call it quits, and move on to a more critical task – choosing a new mattress.
To stop you from fighting a losing battle, here’s a detailed list of stains you probably shouldn’t bother trying to remove, because the effect they had on the fabrics is most likely permanent:
- Acne medication and creams that contain benzoyl peroxide
- Stomach acid
- Chlorine bleach and chlorine, in general
- Strong alkalis found in most homes, such as oven or drain cleaners
- Old urine stains
- Plant food and fertilizers
- Germicides and disinfectants
- Pesticides
- Harsh cleaning agents, such as those used for bathroom cleaning
- Epoxy cement
- Furniture stain
Odor-Free Zone: How To Keep Your Mattress From Smelling
You have to admit that sleeping on a smelly mattress can be quite an off-putting experience and no amount of freshly washed sheets can change that. Plus, if you don’t address it in time, it will most likely become even worse, and affect your sleep quality and comfort. So, ignoring the problem isn’t the way to go here.
Now, if you notice some not-so-pleasant odors coming from your mattress, your first instinct will probably tell you to get one of those store-bought deodorizing products. Let me stop you right there – these won’t deal with the source of the problem, and instead, they’ll cover it up, often with a much stronger, chemical smell. Doesn’t sound great, right?
Luckily for you, there are some effective methods you could try that will keep your mattress odor-free and smelling fresh. Of course, the first thing you should try is merely airing it out – leaving it outside for a few hours could do wonders. But if that’s not the option, here are some other things you could do:
Baking Soda
The best thing about baking soda and the reason why it’s my go-to method for odor removal is the fact that it doesn’t merely mask the smells – it absorbs them and balances out the pH levels. Plus, it’s widely available, and you probably already have some in your home, so why not give it a try right away?
All you need to do is remove the sheets, and sprinkle baking soda directly on your mattress. Don’t be afraid to use a generous amount – there’s no risk of damaging the fabric.
Let it sit for at least an hour or two, although I strongly recommend an overnight treatment for the best possible results. So, if you have a spare bed, now would be a good time to use it – this is where an air mattress could come in handy.
All that’s left to do now is to vacuum up the excess baking soda, dress your mattress in a clean set of sheets, and you’re in for a night of odor-free sleep!
Vinegar
I know you might be hesitant about bringing vinegar into your bedroom, and I get it – the smell can be a bit overpowering. However, when it comes to natural deodorizers, plain white vinegar is your best bet. Plus, the scent usually doesn’t linger for long – it’ll evaporate in a matter of hours.
All you need to do is find an empty spray bottle, fill it with white vinegar, and spray the entire mattress with it – or just the affected area, that’s entirely up to you. Be careful not to overdo it, though. The goal isn’t to soak your entire mattress in vinegar!
After that, open up the windows, and let the sunlight hit your mattress – not only will it help dry it out completely, but could remove any lingering odors, as well.
Additional Tip: If you’re not entirely satisfied with the results, you can repeat the process in a week or so. These are all natural ingredients that aren’t harmful to you or your mattress, so there’s no need to worry about using them “too often.”
Oh, and one more thing – if you want your mattress to smell divine, putting a scented dryer sheet under your bed sheets will undoubtedly do the trick.
What About Mold, Dust Mites, And Bed Bugs?
Stains can be disgusting, sure, but the fact that there might be something living inside your mattress is straight up terrifying!
Mold
If mold starts developing on your mattress, it usually means you’ve left a wet, dirty spot untreated for way too long. There’s no point in pointing fingers now, though. What you need to do is act fast – if you’re lucky enough, it will only be a surface issue, and you’ll be able to save the mattress!
- Vacuum your mattress on both sides, and to avoid spreading the spores (mold is a fungus, after all), dispose of the vacuum bag immediately.
- Next, you need to disinfect the mattress. Mix equal parts of water and rubbing alcohol for a DIY disinfecting solution.
- Dip a cloth into the solution and scrub the moldy area of the bed with it, but be as gentle as possible – you don’t want to damage the fabric.
- Bring the mattress outside, preferably in direct sunlight, and let it spend several hours there – until it’s dry, that is.
- Spray it with the disinfecting solution again, but this time cover the entire mattress, to be on the safe side. Make sure not to saturate it, though.
- Let it dry completely.
Additional Tip:If you happen to notice that there’s black mold growing on your mattress, it’s time to get a new one. The mold has most likely penetrated the deeper layers of your bed, which makes it pretty much impossible to clean.
I know it can be quite an investment, but sleeping on a moldy mattress presents a severe health risk – and you can’t put a price on health, now, can you?
Dust Mites
You may not be able to see them, but the creepy crawlies have probably made themselves at home in your mattress. Sure, it’s better than having bed bugs, but it’s not like you want them to stick around, right?
These tiny creatures can aggravate allergies to the point of making your mattress a not-so-pleasant place to sleep. So, is there anything you can do to get rid of them?
Of course, there is. Dust mites don’t respond well to drastic changes in temperature, which means that you can either let them freeze or boil them. Since you can’t shove your entire mattress into the freezer, using a steam cleaner every few months might be your best bet.
For even better results, vacuum the mattress regularly to keep the situation under control in between steaming sessions, and remember to wash the sheets once a week on a high-temperature setting, too.
Bed Bugs
There’s nothing worse than the idea of having bugs in your bed. Unfortunately, though, the number of infestations has been rapidly growing in the United States – after all, all it takes is one night in a sketchy hotel, and you might pick up an unwanted hitchhiker on your way home.
If that’s the case, don’t panic. Letting the bed bugs bite might be your childhood nightmare, but you can treat most infestations efficiently – you have to be thorough and persistent, though.
Before we start, here’s a quick checklist of common bed bug infestation symptoms:
- Tiny bloodstains on your mattress that you can’t explain.
- Rashes and red, itchy bumps on your body.
- Dark spots on your sheets and bed, which are most likely bed bug feces or molted shells.
- Finding live bed bugs in or around your bed.
Now, let’s see what you can do to get rid of bed bugs as soon as possible!
Throw Everything In The Washing Machine
As I said previously, don’t panic. If it turns out you do have bed bugs, the first thing you need to do is throw everything – and I do mean everything – in the washing machine. So, clothes, bedding, curtains, blankets, and pillows all need to have a trip to the washing machine.
Don’t forget about the stuffed animals, too – they’re a good hiding spot for these tiny bugs!
At least 30 minutes on a hot setting should be enough to kill not only live bugs but the eggs, too.
Vacuum, Vacuum, Vacuum
The majority of bed bug population in your household chooses to call your mattress their home. It makes sense – you’re their primary source of food, so naturally, they’ll try to stay as close to you as possible.
Once you remove the sheets, the next thing you need to do is vacuum the entire mattress thoroughly – better yet, make that the whole bedroom. Pay particular attention to all the folds, creases, and crevices!
Don’t forget to throw away the vacuum cleaner’s bag afterward, though.
Seek And Destroy
Look at it this way:
You’re playing hide and seek with the bed bugs in your bedroom – and the creepy crawlies know how to pick the perfect hiding spot. That’s how most infestations go unnoticed for so long!
So, grab a flashlight, and start searching – check every nook and crevice at least twice. Don’t skip the nightstand and the bed frame, either, in case the bugs decided that your mattress is becoming too crowded and that it’s time for them to move to other furniture in your bedroom.
Have a vacuum cleaner nearby and deal with any unwanted guests accordingly.
Bring On The Heat
You’ve probably heard before that they are sensitive to heat – so, use that to your advantage! Steaming is an excellent way to fight off a bed bug infestation since it kills both the adults and the eggs.
Start by steaming all the pieces of furniture, but don’t forget about all the crevices in the floor and walls, as well as all those hard-to-reach areas. You’d be surprised how creative bed bugs can be when it comes to hiding. The more thorough you are with the steaming process, the lesser the chances of a re-infestation happening.
Use An Encasement To Be On The Safe Side
Okay, so, you have everything thoroughly vacuumed and cleaned up, but the job is not over yet. You should consider getting a mattress encasement, just in case – if you missed a bug or two, and you don’t have anything to protect your bed, you’re looking at another infestation in a few months. Better safe than sorry, right?
The encasement will prevent the bed bugs from getting in and out of your mattress, making it impossible to feed. Eventually, they’ll starve to death. That said, keep in mind that you should have the mattress encasement on for at least a year.
DIY Stain-Removal Kit: A Complete List Of Essential Supplies
Hiring an expert to deal with the stains on your mattress is a valid option, but why would you spend your hard-earned money if you can do the job yourself?
Tools You’ll Need
If you’re interested in assembling your stain-removal kit for all future cleaning purposes (and yes, you could use most of this stuff on other pieces of furniture, not just your mattress), then you should probably start with the tools.
Here’s a quick list of the essentials:
Absorbent Pads
You can use pretty much anything for these purposes, as long as it’s white and has absorptive “powers” – from pieces of cloth and paper towels to sponges, tissues, and cotton, even. And yes, it’s important that your absorbent pads are white because colored ones might “bleed” and leave your mattress with an even bigger stain.
Mixing Bowl (Plastic Or Ceramic)
When it’s time to mix different cleaning solutions and create cleaning agents, it’s always recommended to stick with plastic and ceramic bowls. Stay away from metals, though. You never know what kind of reaction it might cause when you pour the chemicals in – better safe than sorry, right?
Rubber Gloves
And speaking of safety, don’t forget to use some rubber gloves. On that note, the standard kitchen or utility variety works perfectly fine. Ultimately, though, your choice of gloves doesn’t matter – as long as they’re rubber, and they’re capable of protecting your skin from all the harsh (and possibly dangerous) chemicals, they’re good enough for the job.
Medicine Droppers
When you’re dealing with harsh cleaning substances, measuring everything up can be a make or break moment. You don’t want to use too many strong chemicals and risk ruining your mattress, now, do you? That’s why having a medicine dropper might come in handy!
Small Tamping Tool
Even something as simple as a spoon or a brush can work, but feel free to get creative – you need a tool for tapping or “tamping” the stained area, with the hopes of loosening the hold the stain has on the mattress’ material. That said, make sure you only use it on tightly-woven fabrics, because it could damage the more delicate ones.
Dull Knife
Okay, this might sound weird at first glance, but yes, you’ll need a dull knife, too. The idea here is that, instead of smearing the stain further across the mattress, you use a knife to remove any excess dirt from its surface. And, of course, it has to be dull for obvious reasons – you don’t want to cut a hole in it by accident!
Solvents And Chemicals You’ll Need
Okay, now that we have the tools covered, it’s time to talk about supplies that do the actual cleaning – solutions, solvents, chemicals, that kind of stuff.
Solvents
Solvents are usually the first, as well as the last step in a majority of stain removal methods, and these include:
- Water, either lukewarm or cold.
- Rubbing alcohol – but make sure it’s uncolored and unscented.
- A detergent solution you get by mixing one cup of warm water with one teaspoon of any mild dishwashing detergent.
- Paint and grease removers.
- Amyl acetate in its pure form, or a nail polish remover with acetone (the non-oily one, of course).
- Dry cleaning solvents are an option, too.
Lubricants For Water-Borne Stains
Some stains you encounter will be partially washable with water (as a result of being water-borne), meaning you can use the following to loosen them up:
- Glycerine.
- Pre-treatment sprays, such as ones used for laundry, might be of enormous help here, too.
Remember to wash these lubricants off with water thoroughly, though.
Lubricants For Greasy Stains
If you’re dealing with a greasy or an oily stain, using a lubricant to loosen it up might not be such a bad idea.
One thing you need to be careful about with these is that you have to wash them out entirely using a dry solvent. If not, you’re risking some nasty-looking yellow stains on your mattress, which kind of defeats the purpose of stain removal in the first place, right?
- Mineral oil.
- Dry Spotter solution, a combination of mineral or coconut oil, depending on what you have available, and a dry cleaning solvent, in one to eight ratio.
Acids And Alkalis
Now, let’s talk about some contrasting agents that all have very similar uses:
- Lemon juice is more than just refreshing – it can help you remove stains, too. Plus, it doesn’t have that strong smell that vinegar has, even though the acidity level is almost the same.
- Vinegar, either mixed with a detergent solution or diluted with water – mix 1/3 cup of vinegar with 2/3 cup of water.
- Ammonia solution can be added to detergent solutions, as well, or combined with water – one tablespoon of ammonia per half cup of water.
Bleaches
When it comes to bleaches, the rule “less is more” applies perfectly. Make sure not to overdo it, both regarding amounts you’re using and the duration of the treatment – due to their harsh nature, bleaches can quickly ruin the fabrics.
Bleach, in particular, shouldn’t be left on for longer than two minutes, and shouldn’t be used on wool, silk, and spandex, in general. Make sure you check the label on your mattress, too, to see if bleach is a safe option.
- Chlorine bleach solution requires a controlled application, so make sure you use a medicine dropper. The best way to make it is to mix a tablespoon of water with a teaspoon of bleach.
- Hydrogen peroxide – the 3-percent solution – is something you’ll likely need, as well.
- Color Remover.
- Sodium perborate, a less harsh substitute for hydrogen peroxide. It gives the same results, but it does take a bit more time to work, and usually requires more washing after the initial treatment.
Enzyme Products For Starch And Protein
Now, if you ever end up treating a stain with a protein or starch content, you’re going to need some help in breaking them down:
- Laundry detergent with enzymes is a must-have here, so make sure it contains enzymes or has a “protein remover” label.
- Pet stain removers.
- Enzyme presoaks – make sure the label says “stain-lift” or “pre-wash stain remover.”
Safety Precautions To Keep In Mind Before You Start Scrubbing Away
I know you might find this part boring, or you already think you know everything about cleaning and safety precautions, but I strongly suggest you do not skip this part of the article. Removing stains may seem like an easy enough job, but it involves some dangerous chemicals.
So, to avoid damaging the mattress, or even putting your health in danger, make sure you follow these seven safety precautions to the letter:
1 Check The Label
When it comes to cleaning a mattress, labels are your friend. You’ll find everything you need on there – from the exact materials your bed is made from, to whether or not specific cleaning agents and solutions might be suitable for the fabrics in question.
Checking the label is the first and most important thing you should do to avoid further ruining your poor mattress, so don’t skip this step!
2 Do A Test First
Labels might say it’s safe to use a specific stain removal method on the mattress, but most of the time, they do so in broad terms, without taking into account particular solutions, which means you won’t know until you try – and maybe accidentally destroy the mattress.
To avoid these types of disasters, I strongly recommend you do a test on a small patch of fabric first, to see if the two will get along or not. Here’s how to safely test a cleaning solution on your mattress:
- Perform the test on a small area of the stain.
- Apply the cleaning solution – be it pure water, a dry cleaning solvent, bleach, or whatever you plan on using – with a medicine dropper. Only two to three drops should suffice.
- Use an absorbent pad (a white one, of course) to press the area lightly – if you notice there’s a change in color or it’s transferring to the pad, wash out the cleaning agent, and consult a professional cleaner. But if not, you’re good to go.
3 Bleach And Ammonia Don’t Mix – Ever
Mixing bleach and ammonia results in a chain of chemical reactions, one of which produces an extremely toxic gas – chlorine gas. If you paid attention in history classes, you know it was used as a chemical weapon before, and I don’t have to tell you how dangerous creating something like that can be for your entire family. Please, don’t start chemical warfare in your home.
Repeat after me:
Never mix bleach and ammonia.
4 No Rubbing
Another thing you should avoid when you’re trying to get rid of a stain is rubbing. Sure, it’s a good way of cleaning everything else in your household, but with mattresses, it might have the opposite effect and cause the stain to spread even more.
So, unless the instructions specifically tell you to use a rubbing motion, you should stick with blotting, pressing, and tamping.
5 Work In A Well-Ventilated Room
As you saw previously, some stain removal methods will require the use of strong-smelling cleaning agents and harsh chemicals that produce toxic fumes, which could potentially irritate your respiratory tract, or cause you to feel lightheaded and dizzy. You may even end up with a headache.
Of course, you’ll want to avoid that if possible, which is why it’s always a good idea to do the cleaning in a well-ventilated room. You should also spend some time outside afterward, to get some fresh air.
6 Moisture Is The Enemy
Using water is pretty much inevitable when you’re cleaning your mattress, especially when it’s time to wash out the cleaning agents. However, that doesn’t mean you should allow it to get dripping wet – that would probably be the worst thing you can do to your mattress.
Moisture control is essential here – use liquid solutions sparingly, and blot with an absorbent pad as frequently as possible.
7 Know When Bleach Is Not The Solution
Lastly, I want you to remember that bleach shouldn’t always be your go-to cleaning agent. Even if you’re accustomed to using it around your home – it does have exceptional disinfecting abilities, after all – you might want to skip the mattress.
Materials such as wool, spandex, and silk don’t do well when treated with bleach, so be careful not to ruin your mattress in the process.
FAQ About Mattress Care
One question I often get from people – besides the common “how to clean a mattress” dilemma, of course – is how often they should clean their mattress.
Now, there’s no right or wrong answer here, solely because every sleeper under the sun has different habits and needs. However, a good rule of thumb is to clean your mattress at least two times a year. Those of you that have allergies should up the numbers a bit and clean their bed as soon as the tell-tale allergy symptoms rear their ugly head.
Here are a few signs it’s time for a thorough cleaning session:
Final Thoughts
That’s it, time to wrap things up – by now you’re undoubtedly a pro when it comes to mattress cleaning. Not only do you know how to clean a mattress the right way but you know why it’s vital to do so regularly, as well!
Of course, if you’re an expert on DIY mattress care yourself, and you have a few tricks up your sleeve, don’t be afraid to share them with the rest of us in the comment section below!


